 Installing a hard drive
You will need:
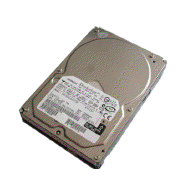
- The hard drive
- 5-pin S-ATA connector (Included with the Power Supply.)
- SATA Cable
- Screwdriver
- Screws
Method:
- Remove any packaging from the Hard Drive and place it on your desk. You may also want to shutdown and unplug your computer from the power outlet.
- Open up the side panel of your case and inspect the front of it for a hard drive bay. Search for an empty slot. This is where the hard drive is going to spend its time in your computer.
- Also in this time, locate the 5 pin S-ATA connector. It should be fairly close to the power supply. This cable is important as it provides power for your hard drive.
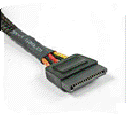
S-ATA Connector
4. Next, install the hard drive to the hard drive cage. Sometimes this can be as simply
as push a few clips, other times you may have to secure it using screws. Also
in this time, connect the 5 pin S-ATA connecter to the hard drive, as well as the
SATA cable, do note though that the other end of the SATA cable plugs into the
motherboard.

Thanks for reading!

Great tutorial for starters.
ReplyDelete