Here is a link and a video from the channel.
Thumbs up and subscribe, lets get this thing going.
Enjoy all!
Saturday 26 March 2011
Sunday 20 March 2011
Setting up Windows 7 with a solid state drive
Setting up Windows 7 with a solid state drive
Yesterday I purchases an OCZ Vertex 2 3.5" solid state drive. Now to to anybody who knows about solid state drives (and I assume you do if you are reading this blog) you know that they are very limited in storage size.
What I did to overcome the size limitations was pick up a Western Digital Caviar Black 1TB drive and run all of the software I don't deem to be important enough off of that. This allows me to have 1.1TB storage, with 120GBs of that being super fast SSD memory.
Here is a step by step setup process for anyone interested in doing this:
Installing the New Drives
- If you bought a new hard drive mirror the old disk onto the new one.
- Install the new SSD and HDD into your computer.
- Install the operating system onto the Solid State Drive
The rest of the guide will be Windows 7 specific but you can adapt to other versions of Windows such as XP very easily.
- Open my computer, right click and go to Manage.
- Click on 'Disk Management"
- Your second drive should be listed here under its factory name (WDCB97954...)
- Right Click in the area at the bottom for Disk 1 and click "Mark Partition as Active"
- Rename the Disks as you see fit. I called mine SSD (C:) and Data Storage (Z:)

You now have two active disks. But the SSD is still set as your primary disk and will fill up very quickly if we don't do something about that.
- Go to start and type "REGEDIT"
- Find "HKEY_LOCAL_MACHINE\SOFTWARE\Microsoft\Windows\CurrentVersion\"
- With the "CurrentVersion" Key selected you should be able to see some registry values in the browser on the right. Click through the values such as "CommonFilesDir" and change the C:\ to the name of your second drive such as Z:\
 Now that you have those changed you need to COPY your Program Files to the new drive. All the default software should now be running off of the new drive and the computer will try to install new programs to the Hard Drive Before the Solid State. To install to the Solid State all you need to do is change the drive letter when prompted by the installer.
Setting up programs to use Both Drives
I use Steam to buy and play games. When I got my SSD one problem I was faced with that not all my games would fit on the SSD. A work around found was to install onto both drives, with different games installed on each drive. I also compiled two batch files to manage which drive steam was loaded from.
- Open notepad.exe and type the following
That should live on the SSD and a mirror version with different drive letters on the Hard Drive like so:TASKKILL /F /IM "steam.exe"
cd c:\
cd Program Files (x86)
cd Steam
start Steam.exe

TASKKILL /F /IM "steam.exe"Save the file as "filename.bat" file name being what ever you want it to be. Then make shortcuts to both and you are ready to go. When you click on one of the shortcuts, it will end the running copy of steam and open the new one. Now you can have your most played games on your SSD and your less played games on the HDD.
cd Z:\
cd Program Files (x86)
cd Steam
start Steam.exe
Thanks for reading!
Installing a hard drive
 Installing a hard drive
You will need:
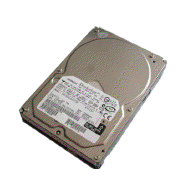
- The hard drive
- 5-pin S-ATA connector (Included with the Power Supply.)
- SATA Cable
- Screwdriver
- Screws
Method:
- Remove any packaging from the Hard Drive and place it on your desk. You may also want to shutdown and unplug your computer from the power outlet.
- Open up the side panel of your case and inspect the front of it for a hard drive bay. Search for an empty slot. This is where the hard drive is going to spend its time in your computer.
- Also in this time, locate the 5 pin S-ATA connector. It should be fairly close to the power supply. This cable is important as it provides power for your hard drive.
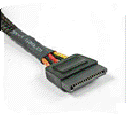
S-ATA Connector
4. Next, install the hard drive to the hard drive cage. Sometimes this can be as simply
as push a few clips, other times you may have to secure it using screws. Also
in this time, connect the 5 pin S-ATA connecter to the hard drive, as well as the
SATA cable, do note though that the other end of the SATA cable plugs into the
motherboard.

Thanks for reading!
Subscribe to:
Posts (Atom)
